Below are detailed instructions for setting up a CNAME in GoDaddy. For a general overview of domains, head over to Setting Up Your CNAME.
Setting up a Custom Domain with GoDaddy
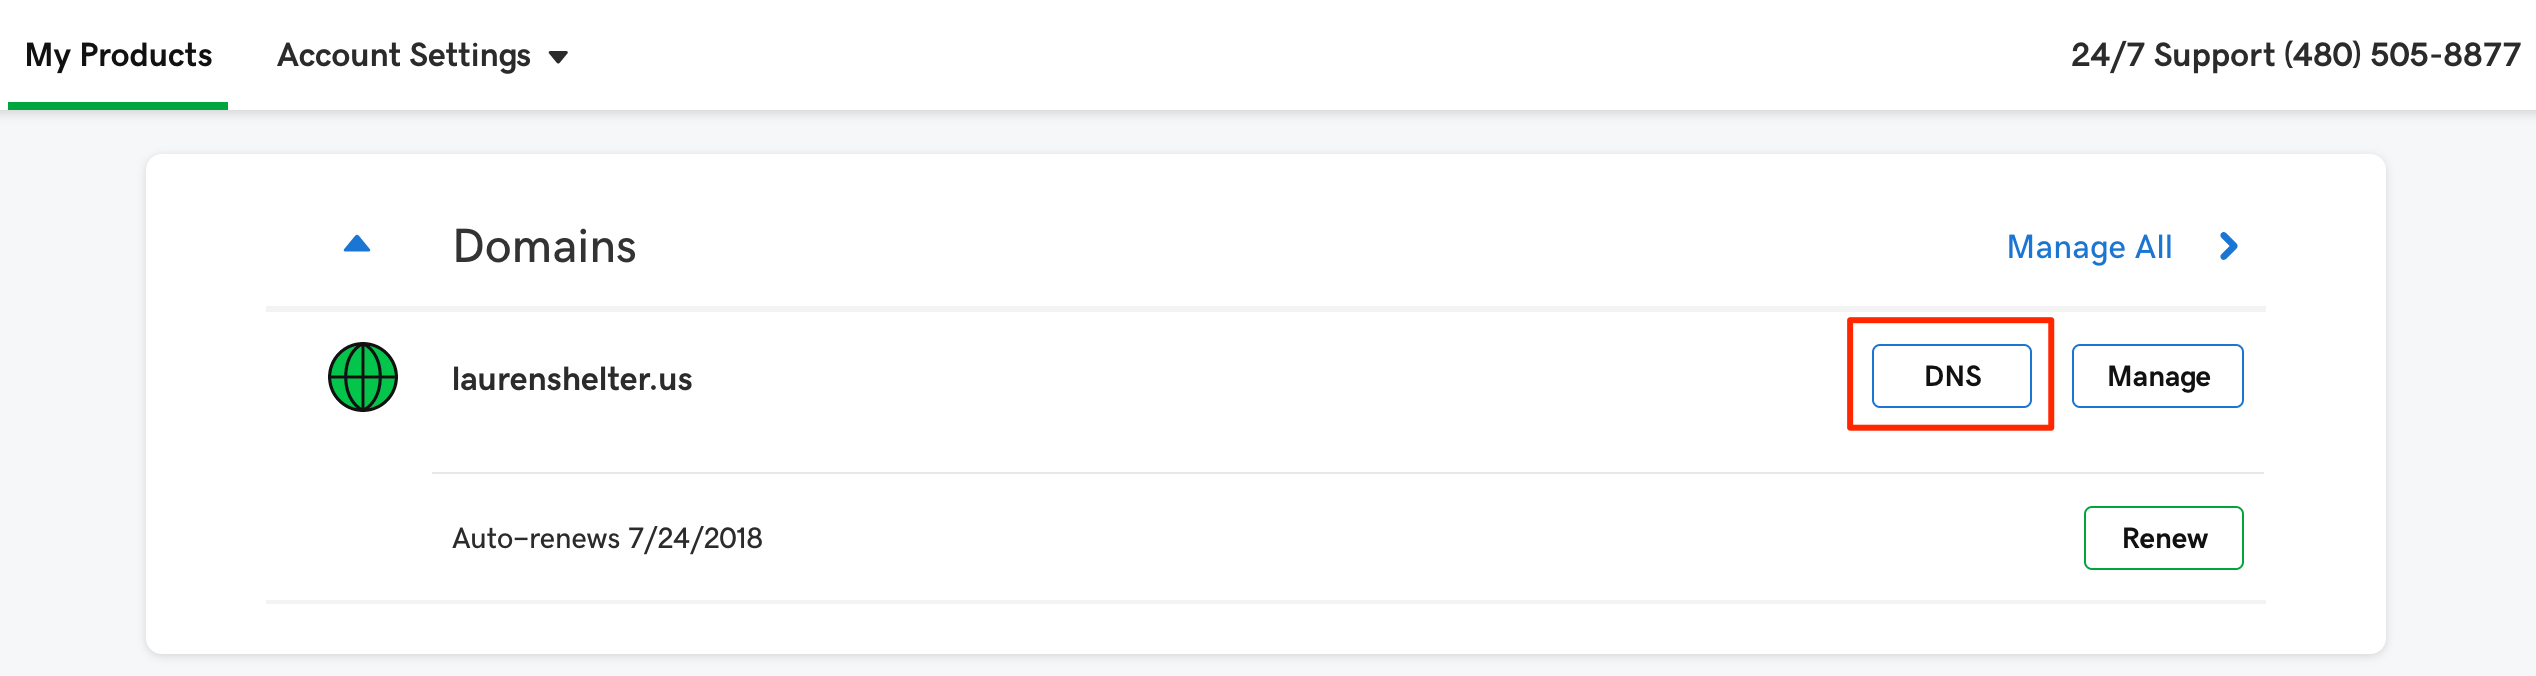
1. Sign in to your GoDaddy account, and you should be brought to the "My Products" page.
2. Here you should see a list of all your registered domain names. Find the domain for which you'd like to set up a CNAME, and click the DNS option.
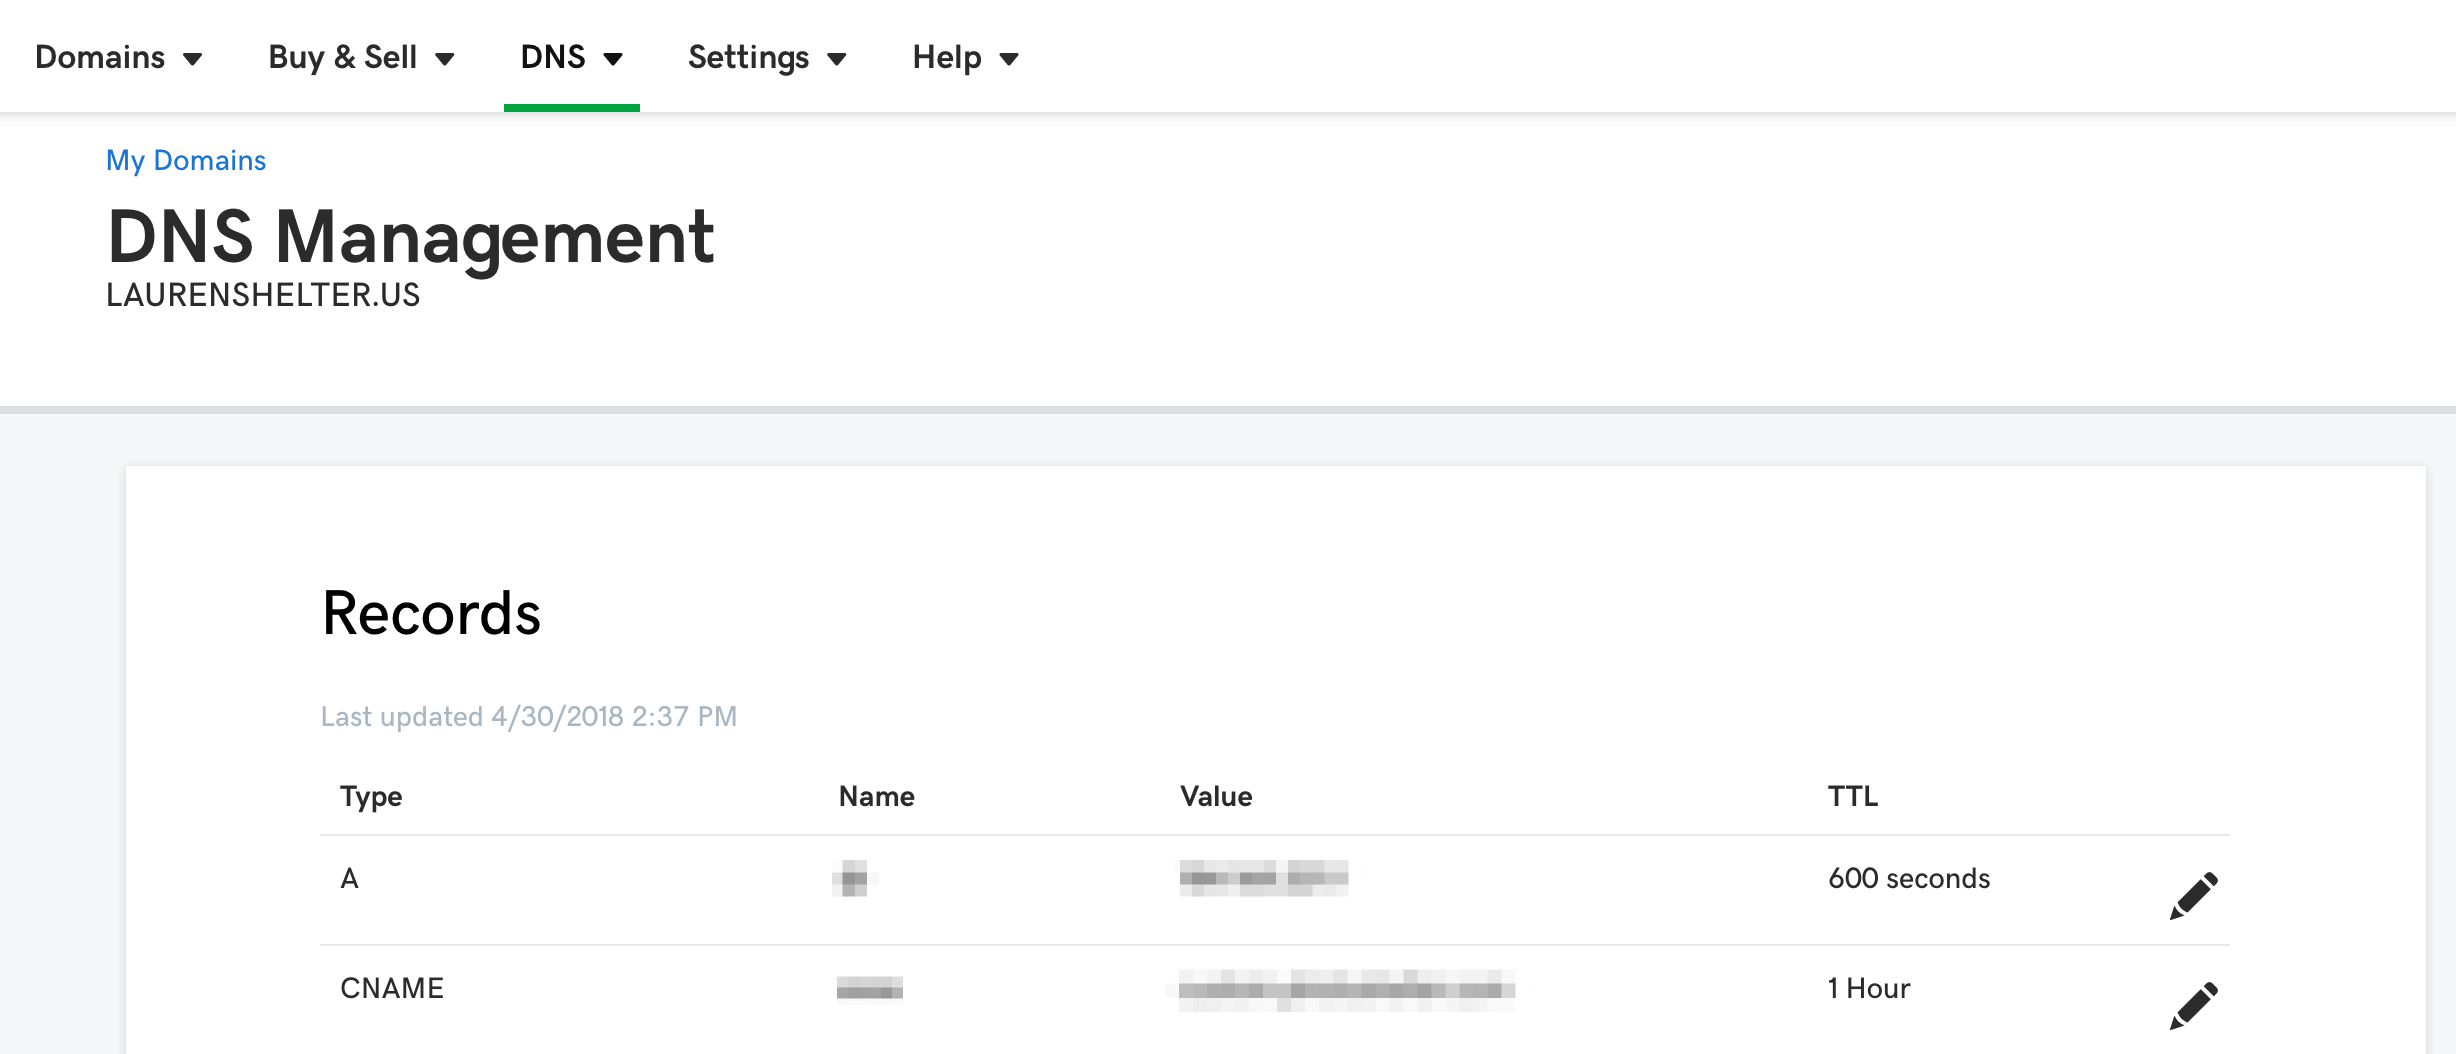
3. You'll be brought to your DNS Manager, where you'll be able to add or edit your new CNAME.
Note: If your DNS Manager doesn't show a list of records (as pictured below), you may need to first point your domain to GoDaddy's nameservers. To do this, scroll down to the "Nameservers" section and click "Change." Under "Choose your nameservers type," select "Default" and then "Save."
***We find that most of our members are looking for a CNAME of www.MyDomain.com. If this is your goal, you may find there is already a record for "www" (most likely at the bottom of the list).***
If there is a "www" record, click the Pencil icon on the right, then move ahead to step 5.
If there is no record for "www," scroll to the bottom and click "Add."
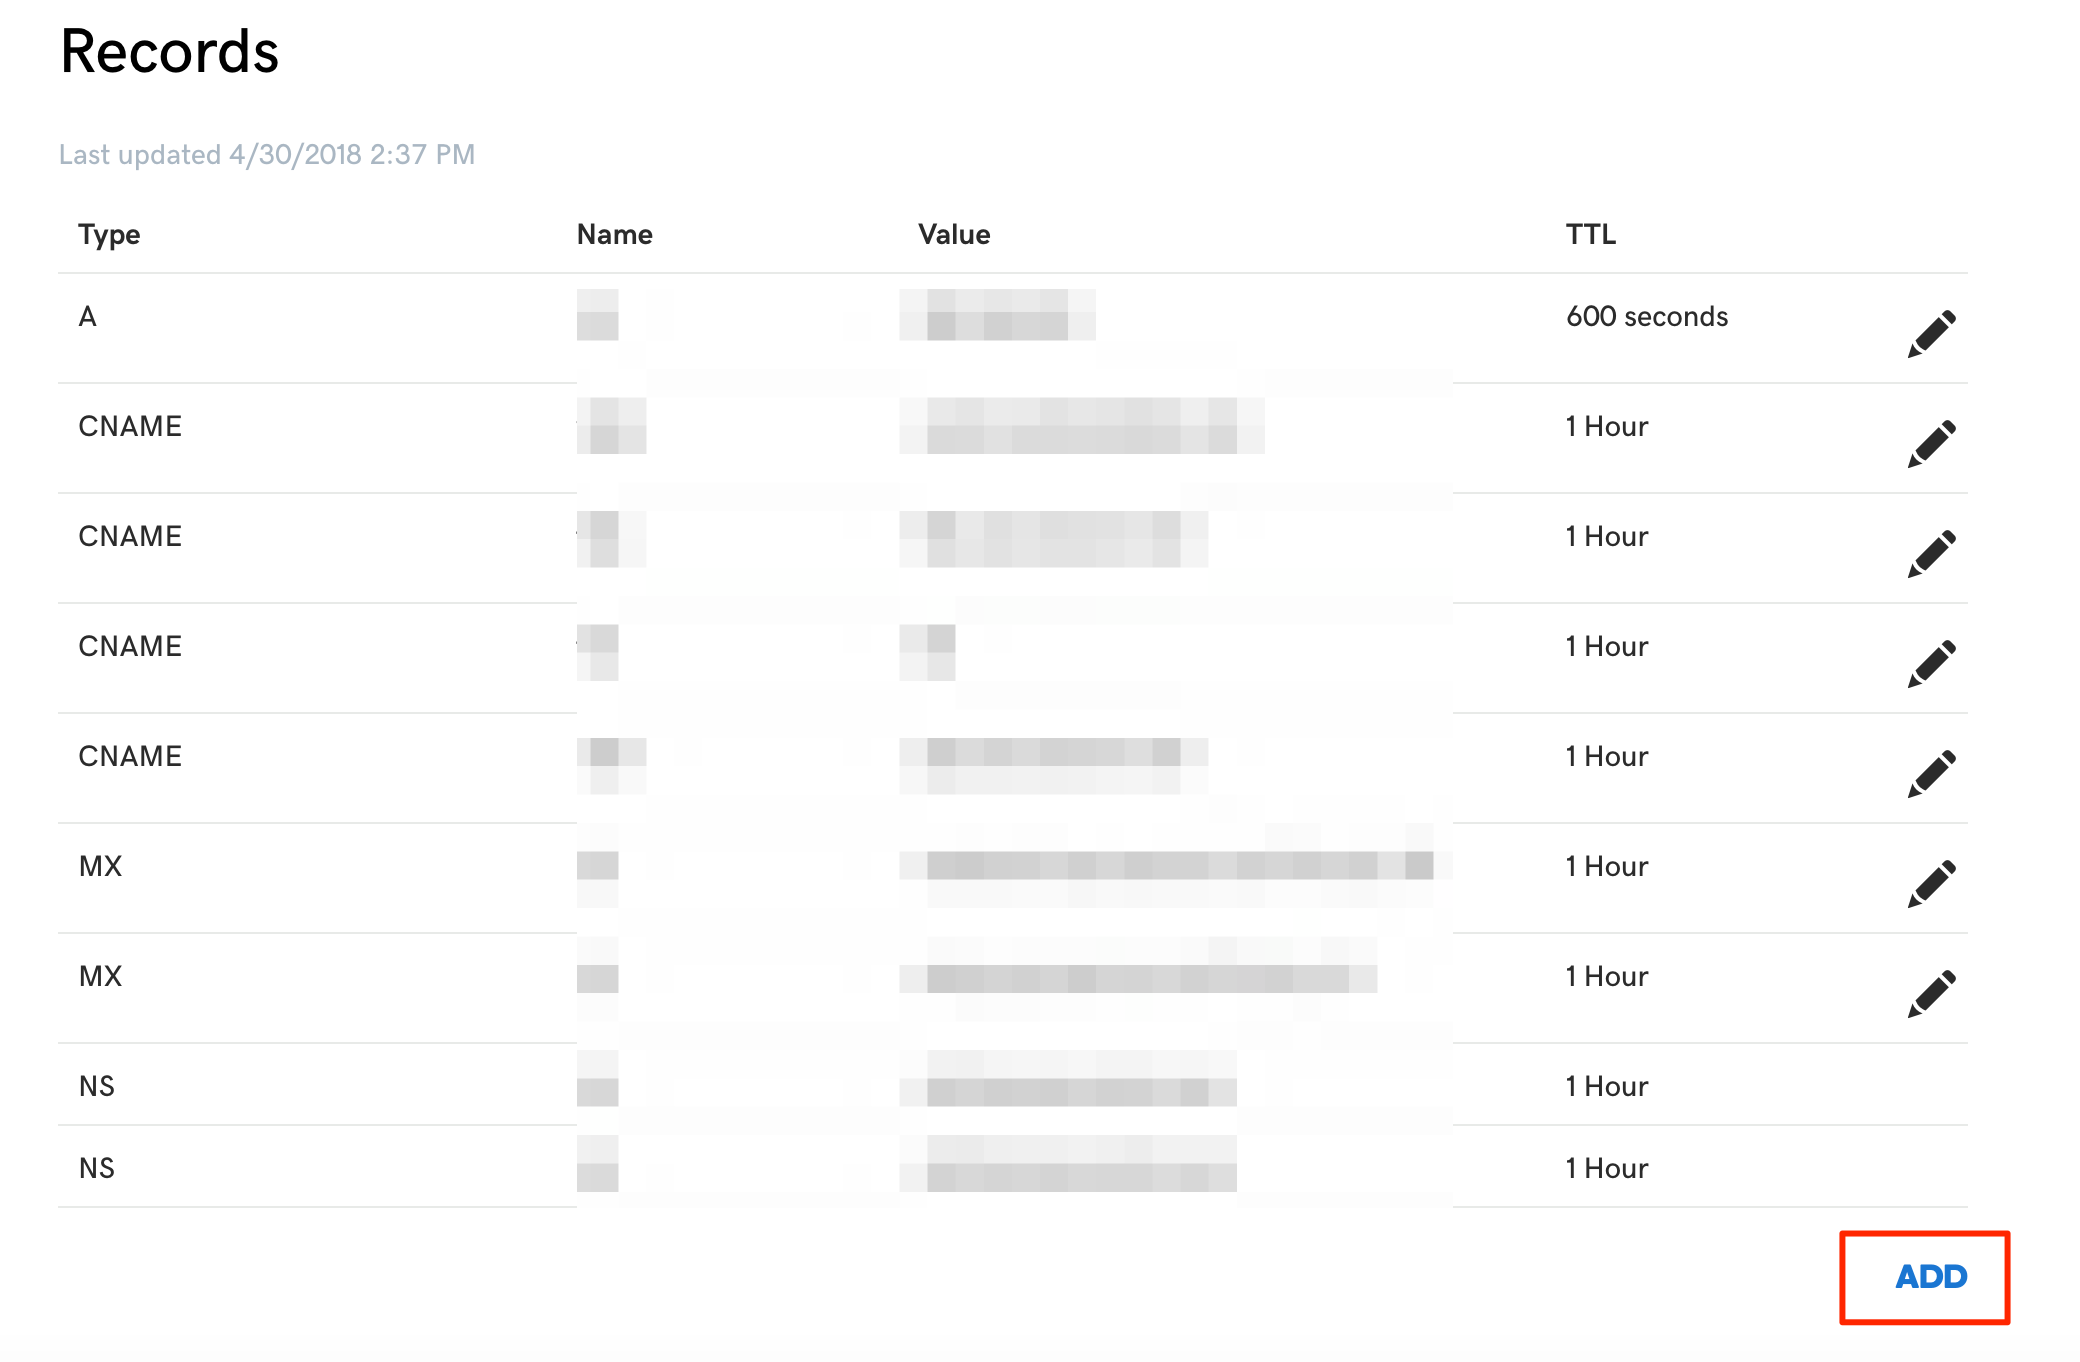
4. In the pop-up window that appears, select "CNAME" from the "Type" drop-down menu. You will then be asked to enter a "host" name, which will be the subdomain (or prefix) that appears before your domain itself. Again, most of our members prefer to use the host "www," resulting in a CNAME of www.MyDomain.com. However, the host for your CNAME can be set to any word you like. Other examples include:
- If you'd like to use a CNAME of "archive.MyDomain.com", you would set your host to "archive."
- If you'd like to use a CNAME of "galleries.MyDomain.com", you would set your host to "galleries."
In this example, we will use "www" for the Host.
5. In the "Points To" or "Value" field, enter "custom.photoshelter.com" (without the quotes) -- not www.photoshelter.com or YOURNAME.photoshelter.com. This is the same address to which every PhotoShelter member's CNAME points, and it does not change, regardless of your own personal PhotoShelter website address. 
6. The TTL (i.e. time to live) value can remain at 1 hour.
7. Next, click the "Save" button.
8. Scroll down until you locate "Forwarding." Once located, click the pencil icon.
9. Forward your domain to the CNAME you just set up in the previous set (e.g. www.myname.com). Make sure you click the dropdown to forward to https://. The default http:// will not work as your site is https secure.
This forward will ensure that your clients will land on your PhotoShelter website whether or not they include the "www" in the address. In the example below, "xposurearts.com" is the domain, so the forward goes to "https://www.xposurearts.com".
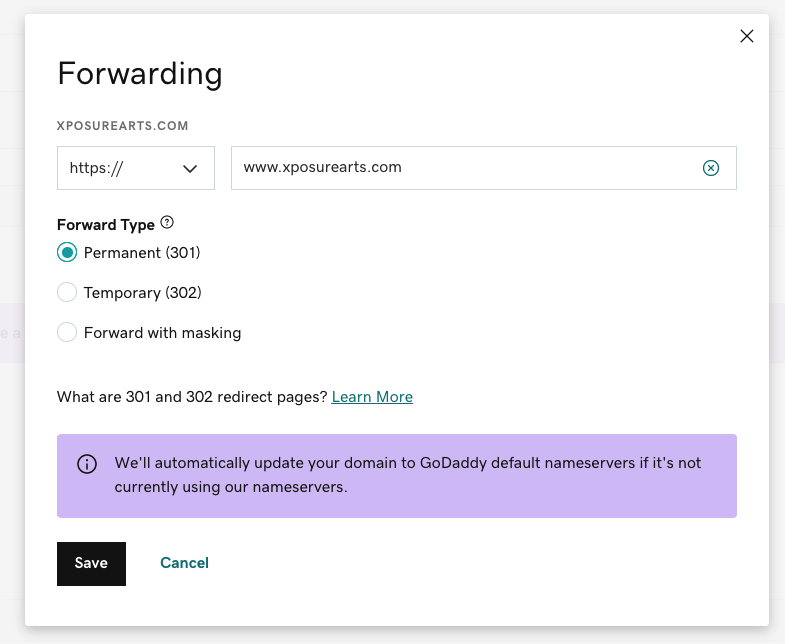
Note: Take this step if you do not plan to use your custom domain for anything but your PhotoShelter website. Be sure to choose "forward only" option. (The only other option is to forward with masking, which you should not choose under any circumstances. Masking can conflict with your PhotoShelter website's technology and make it appear "broken" in a number of ways.)
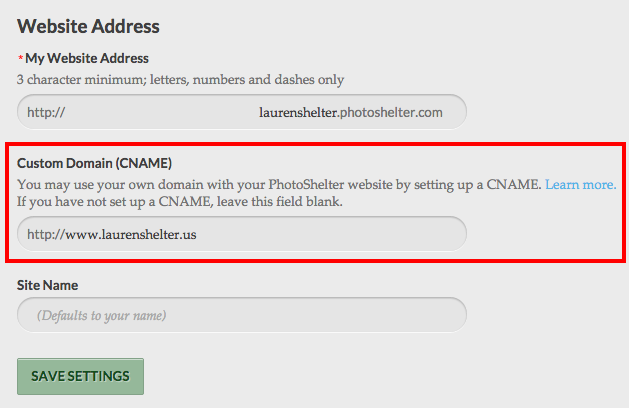
10. Now, log in to your PhotoShelter account, and select "Website" > "General Settings" on the left-hand side of the page. Enter your CNAME into the Custom Domain (CNAME) field. The CNAME is the alias plus your domain (e.g. "www.MyDomain.com").
11. Finally, be patient. DNS changes can take up to 48 hours to propagate across the Internet, so if you are unable to enter your CNAME into PhotoShelter shortly after creating it with GoDaddy, please allow a few hours to pass for your DNS changes to fully go through.
Note: Because all of the work must be performed at the domain level, you should contact GoDaddy Support if you need additional help.