PhotoShelter defines a watermark as a visual overlay that is placed upon all publicly viewable images, adding an important layer of image security. You will not see watermarks on your images in your Image Browser, only on your public website.
Image Watermarking is a global setting, meaning that if enabled, all publicly viewable images will display the watermark. However, you may disable watermarking for specific galleries from within your Image Browser, if you so choose. See below for further instructions.
Also remember that if/when you make images watermarked using the PhotoShelter watermarking method available to be printed, the watermark will not appear on the image. If you upload images with watermarks already on them, and someone buys a print, the watermark will be printed.
PhotoShelter has a built-in watermarking feature, which provides two types of watermarks:
-
Text watermark based on your IPTC Copyright fields
-
Graphic overlay using a PNG file
This means you don't have to upload already watermarked images. You can let our system do that for you - and save time and disk space in the process.
If you decide to turn watermarks on, PhotoShelter will display a text watermark using the information contained in your IPTC Copyright field (shown below).

This tutorial will also explain how to upload a custom image and use it as your watermark, as shown below.

Watermarks are one way to discourage image theft. A watermark with a copyright notice and/or a URL provides security as well as a way for a viewer to contact you if they want to legally license the image.
Use our Text Watermark:
1. Select Website > Image Security from the navigation bar.
2. Scroll down to the Image Watermarking area.
3. Next to Watermark Images select the Yes option.
4. If you select Yes, PhotoShelter will automatically read the IPTC copyright field on each image to determine what to the watermark text.
5. Choose the watermark location by selecting from the options in the drop-down menu.
6. Click Save Changes to update your settings and preview your watermark.
7. Wait while the change is saved to our network. Since we watermark your images on hundreds of servers across the globe, watermark changes may take 24 hours to appear sitewide.
Use your own Watermark:
Apply a watermark you've created to your PhotoShelter images.
1. Select Website > Image Security from the navigation bar.
2. Scroll down to the Image Watermarking area.
3. Next to Watermark Images select the Yes option.
4. Click the Choose File button and select your watermark image from your computer.
5. Choose the watermark location by selecting from the options in the drop-down menu.
6. Click Save Changes to update your settings and preview your watermark.
7. Wait while the change is saved to our network. Since we watermark your images on hundreds of servers across the globe, watermark changes may take 24 hours to appear sitewide.
Preparing a Watermark in Photoshop
If you choose to upload your own watermark, we suggest using a 24bit PNG file because it supports transparency.
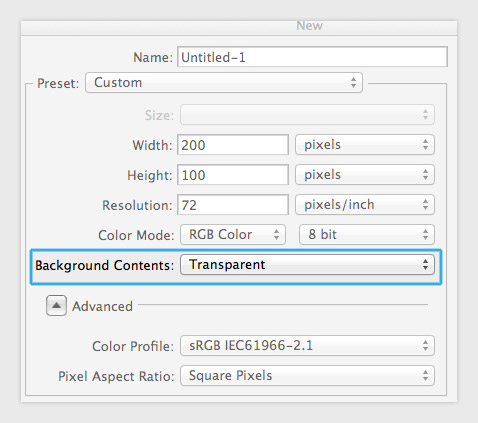
1. Open a new document in Photoshop. The size of your watermark shouldn't exceed the size of your screen resolution image. For reference, PhotoShelter will display your watermark relative to how big it will appear on a 2040px image at 72dpi.
Example: if you want your custom watermark to take up half of a landscape image, you should create a watermark file with a width of 1020px (half of 2040px).
2. Make sure you set a transparent background color.
3. You can use the type tool or import your logo into the file.
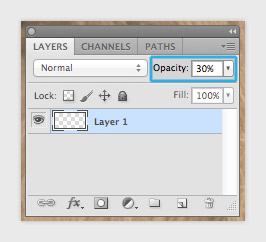
4. You can adjust the Opacity of the text/image in the Layers Palette. You can use any opacity you want, but 30% is a good level in our experience.
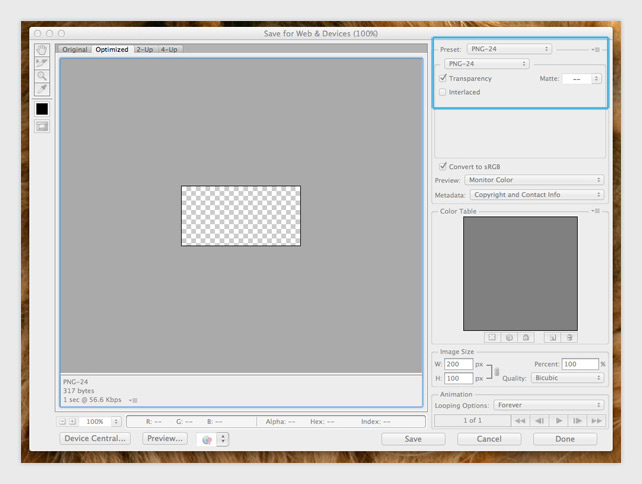
5. Go to File > Save for Web & Devices.
6. Select PNG-24.
7. Once your file is saved, you can upload it as your Watermark Image.
Altering the Information for a Text-Only Watermark
If you're using the text-only watermark (default) and it says "copyright" instead of your name, you likely need to change your images' IPTC Copyright information.
When using a text watermark, PhotoShelter pulls the information contained in the IPTC Copyright field for each image. Some older cameras automatically populate this field with the word "copyright." If the copyright field is blank in the image when you upload it, PhotoShelter will display it as "Copyright Protected Image."
If you want to change the wording, you can do this in a batch:
1. Select Images from the Navigation Bar. Then select the gallery in the Left Pane containing the images whose IPTC metadata you want to edit.
2. Select the images you want to edit in the Center Pane. Use the command key on a Mac or the control key on a PC to select multiple files. To select all the images in a gallery, click the blue hyperlinked word All at the top right of the Center Pane.
3. In the Actions drop down-menu, select Edit IPTC.
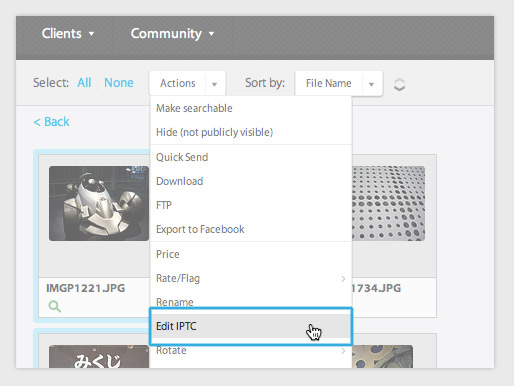
4. The Edit IPTC information pop-up box will appear. Locate the Copyright field and enter your name or other desired text (company name, etc.).
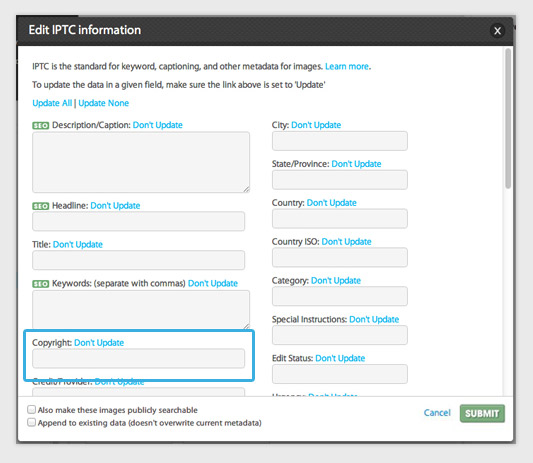
5. To apply all changes, click the Submit button.

Turning Watermarks Off for Specific Galleries
If you enable watermarks for your images, you may choose to turn them off for specific galleries from within your Image Browser, either in batch or one gallery at a time.
To disable watermarks for specific galleries in batch:
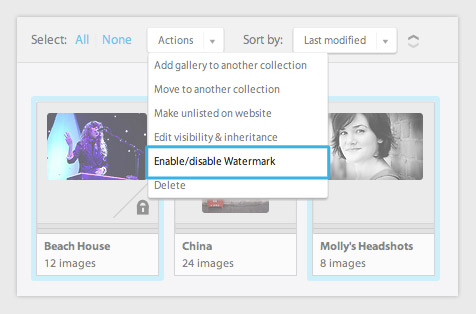
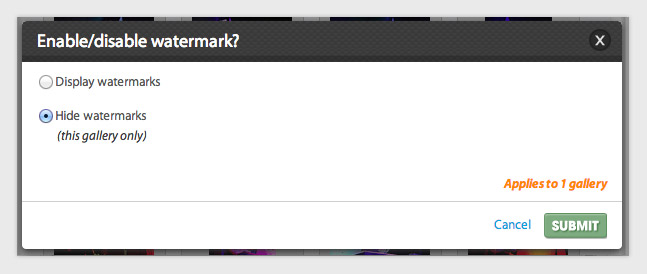
1. From the Center Pane of your Image Browser, select one or more galleries, and click the Actions drop-down menu > Enable/disable watermark.
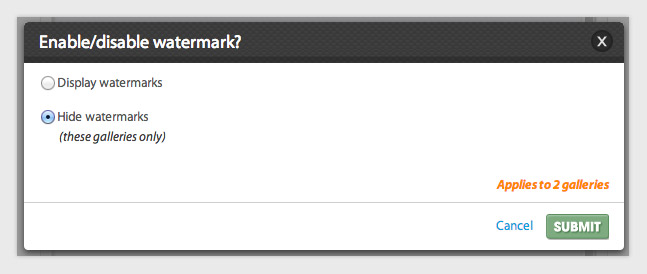
2. If you have watermarks turned on globally and would like to turn them off for the selected galleries, choose the Hide watermarks option from the pop-up box that appears. (If you’d already hidden watermarks for these galleries and would like to turn them back on, choose Display watermarks.)
To disable watermarks for specific galleries one gallery at a time:
1. From the Left Pane of your Image Browser, select a gallery so its contents appear in the Center Pane.
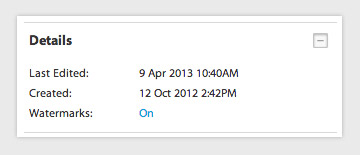
2. From the Right Pane, locate the Watermarks option, which lives under Details. If you have watermarks turned on globally and would like to turn them off for this gallery, you’ll find a blue On link next to the Watermarks option. Click this link.
3. Choose Hide watermarks from the pop-up box that appears. (If you’d already hidden watermarks for these galleries and would like to turn them back on, choose Display watermarks.)
NOTE: Any changes to your watermark settings -- whether applying a watermark sitewide, or disabling watermarks at the gallery level -- may take 24 hours to appear.