Once you’ve created at least one Pricing Profile and configured your payment processor, you can apply your Pricing Profile(s) to the images you wish to sell in the Image Browser.
- Applying a Pricing Profile to a Gallery
- Applying a Pricing Profile to a Single Image
- Enabling Add to Cart Links
- Displaying the Cart Icon in your Portfolio
Applying a Pricing Profile to a Gallery
To apply a Pricing Profile to an entire gallery, follow these steps:
1. Click “Images” from the navigation bar to access the Image Browser.
2. In the Left Pane, choose the gallery that contains the images you want to price. Then, select all the images within a gallery by clicking “Select: All” in the top left of the Center Pane.
3. Click the “Actions" drop-down menu, then select “Price.”
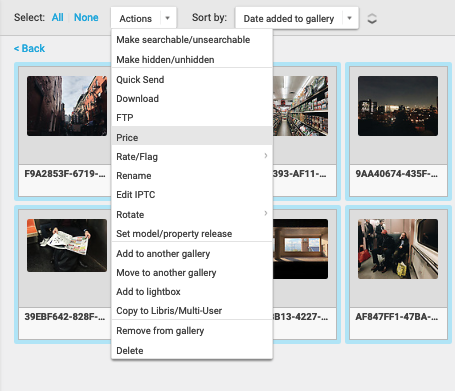
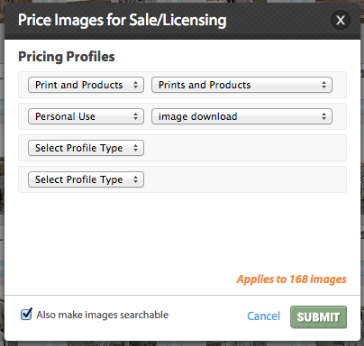
4. In the window that appears, choose a Pricing Profile type from the options on the left, then select the Pricing Profile you would like to apply to your images on the right. When you’re done, click the green “Submit” button.
Applying a Pricing Profile to a Single Image
To apply a Pricing Profile to a single image, follow these steps:
1. Click “Images” from the navigation bar to access your Image Browser.
2. In the Left Pane, select the gallery that contains the image you want to price, then select the image in the Center Pane.
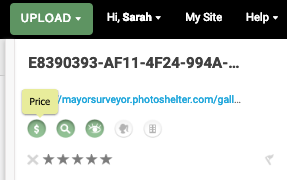
3. In the Right Pane, click the dollar sign button.
4. The Price Images for Sale/Licensing pop-up window will appear. Click “Add Pricing.”
5. In the window that appears, choose a Pricing Profile type from the options on the left. On the right, select the Pricing Profile you would like to apply to your images. Images that are priced will have a small green dollar sign below them.
NOTE: To remove a Pricing Profile from a group of images, select the images in the Center Pane. From the “Actions” drop-down menu, select “Price.” In the pop-up box, select “No Profile (remove existing).”
Enabling Add to Cart Links
After you've applied pricing to your images, you might be wondering how your clients purchase the images you've marked for sale. If you head to your archive and don't see an "Add to Cart" button next to your priced images, you might need to check your Archive Page Settings and ensure the Add to Cart links are turned on.
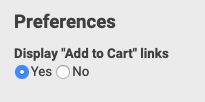
On that page, you can also adjust your preferred pricing type. "Prints" is the default option, but you can adjust this setting so that "Products," "Image Packages" or "Downloads" are the first items offered on the add to cart screen.
Displaying the Cart Icon in your Portfolio
If you'd like your visitors and potential clients to be able to purchase images from your featured galleries or collections, you can choose to display a cart icon in the portfolio. Each template varies slightly, but you'll be looking for the blue edit icon that corresponds to your Image Viewer settings, which you can access in the Site Builder.